The store will not work correctly in the case when cookies are disabled.
JavaScript seems to be disabled in your browser.
For the best experience on our site, be sure to turn on Javascript in your browser.
Important: The information presented here is for the use of a qualified, experienced technician. Without the background knowledge which comes with training, you risk doing more damage then good to the copier & also risk your own safety. If you are not willing to take 100% responsibility for your actions, do not use the information posted here. Thank you. Read our conditions of Use for more information.
4110 style - Fault Code 093-311
4110 style - Fault Code 093-311
Technical Specifications
Information for Xerox® models: (WorkCentre) WC-4110, 4112, 4127, 4590, 4595, D95, D110, D125, D136
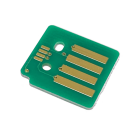
093-311 – Toner Dispense Failure
First you’ll want to figure out what caused the toner dispense failure.
Check the Dispenser Auger and gears for binding or damage. Clear out any clumped up (impacted) toner. If the toner was not bound up anywhere, then you’d want to check and test the Toner Dispense Motor. To test the motor, you can first measure resistance across pins 1 and 2 on the motor’s connector. A measurement between 22 and 27 ohm would be normal. You can also run the motor from Component Control (IO check) in diagnostics using code 093-003 (the motor will run for 2 seconds when you hit start). (note it might be necessary to first clear the fault code from NVM Read / Write to get the component control to work… read below about resetting the fault code).
Check for bent, broken, or dirty pins (oxidation buildup) … try disconnecting and re-connecting the connectors a few times to help clean the oxidation off of the pins. This only serves as a temporary fix if it works… you will want to come back to each connection and apply Stabilant 22a when you have the problems solved and you’re ready to reconnect it all for the final time.Also check the Low Toner Sensor to make sure there is no impacted toner against the round face of the sensor. If so, clean the sensor’s face or replace the sensor if necessary (130E82720)
Once you solve the mechanical problem or replace any bad parts, you will need to reset the Fault Code. This will require three things to happen:
First you will need to go into Diagnostics and reset NVM Read / Write code 762-084 back to “0”. Second you should make sure the toner cartridge is actually a good one. Make sure it still has a good amount of toner in it. Also note that it’s possible for the cartridge to have fused or clumped toner inside of it (for example a toner cartridge which was stored in high heat such as the back of a technician’s car). If you put something over the hole in the end of the cartridge, you can shake the cartridge and listen carefully… you should not hear anything rattling around inside there…Third… If you determine that the toner cartridge is ok… and it still has toner in it, you will still need to order a new Toner CRUM chip: D95TRC (or D136TRC
Information Reference
Based on field technician experience and reference to the OEM Service Manuals.
Choose Model
All Models
4 (DocuColor 4)
12 (DocuColor 12)
12 (FaxCentre F12)
15 (M15)
15i (M15i)
16 (PE16)
16 (Pro-16)
16fx (Pro-16fx)
16i (PE16i)
16p (Pro-16p)
20 (C20)
20 (M20)
20i (M20i)
21 (Bookmark 21)
23 (XC23)
23 (XDL23)
24 (DocuPrint N24)
24 (WorkCentre M24)
32 (C32)
32 (DocuPrint N32)
32 (WorkCentre Pro32)
33 (XC33)
33 (XDL33)
33D (XC33D)
33D (XDL33D)
35 (Bookmark 35)
35 (CopyCentre C35)
35 (WorkCentre M35)
35 (WorkCentre Pro-35)
40 (Bookmark 40)
40 (C40)
40 (DocuPrint N40)
40 (WorkCentre Pro-40)
45 (CopyCentre C45)
45 (WorkCentre M45)
45 (WorkCentre Pro-45)
50 (DCCS-50)
55 (Bookmark 55)
55 (CopyCentre C55)
55 (WorkCentre M55)
55 (WorkCentre Pro-55)
60 (Color C60)
60 (XE60)
62 (XE62)
64 (XE64)
65 (CopyCentre C65)
65 (DocuPrint 65)
65 (DocuTech 65)
65 (WorkCentre Pro-65)
70 (Color C70)
75 (Color C75 Press)
75 (CopyCentre C75)
75 (DocuPrint 75)
75 (DocuTech 75)
75 (J75 Press)
75 (WorkCentre Pro-75)
80 (XE80)
80 (Versant 80)
82 (XE82)
84 (XE84)
88 (XE88)
90 (CopyCentre C90)
90 (DocuPrint 90)
90 (WorkCentre Pro-90)
90 (WorkCentre XE90 / XE90fx)
90fx (XE90fx)
B7025 (VersaLink)
B7030 (VersaLink)
B7035 (VersaLink)
B7125 (VersaLink)
B7130 (VersaLink)
B7135 (VersaLink)
B9100(PrimeLink)
B9110(PrimeLink)
B9125(PrimeLink)
B9136(PrimeLink)
7025 (VersaLink C7025)
C7120 (VersaLink C7120)
C7125 (VersaLink)
C7130 (VersaLink)
C8030
C-8030
C8035
C-8035
C8045
C-8045
C8055
C-8055
C8070
C-8070
C9065(PrimeLink)
C9070(PrimeLink)
100 (WorkCentre XD100)
100 (DocuTech 180)
100 (Nuvera 100)
102 (WorkCentre XD102)
103 (WorkCentre XD103)
103f (WorkCentre XD103f)
104 (WorkCentre XD104)
105 (WorkCentre XD105)
105f (WorkCentre XD105f)
118 (CopyCentre C118)
118 (WorkCentre M118)
120 (PE120)
120 (WorkCentre XD120)
120 (DocuTech 120)
120f (WorkCentre XD120f)
120i (PE120i)
120 (Nuvera 120)
123 (CopyCentre C123)
123 (WorkCentre M123)
123 (WorkCentre Pro123)
125 (WorkCentre XD125)
125f (WorkCentre XD125f)
128 (CopyCentre C128)
128 (DocuTech 128)
128 (WorkCentre M128)
128 (WorkCentre Pro128)
130 (WorkCentre XD130)
130 (WorkCentre XD130df)
133 (CopyCentre C133)
133 (WorkCentre M133)
133 (WorkCentre Pro133)
135 (DocuTech 135)
144 (Nuvera 144)
155 (WorkCentre XD155)
155 (WorkCentre XD155df)
155 (DocuTech 155)
165 (CopyCentre 165)
165 (WorkCentre 165)
175 (CopyCentre 175)
175 (WorkCentre 175)
180 (DocuTech 180)
180 (Versant 180)
200 (Nuvera 200)
212 (DocumentCentre 212)
214 (DocumentCentre 214)
215 (Pro215)
220 (DocumentCentre 220)
230 (DocumentCentre 230)
232 (CopyCentre 232)
232 (WorkCentre Pro-232)
232 (WorkCentre 232)
238 (CopyCentre 238)
238 (WorkCentre Pro-238)
238 (WorkCentre 238)
240 (DocuColor 240)
240 (DocumentCentre 240)
242 (DocuColor 242)
245 (CopyCentre 245)
245 (WorkCentre 245)
245 (WorkCentre Pro-245)
250 (DocuColor 250)
252 (DocuColor 252)
255 (CopyCentre 255)
255 (DocumentCentre 255)
255 (WorkCentre 255)
255 (WorkCentre Pro-255)
260 (DocuColor 260)
265 (CopyCentre 265)
265 (DocumentCentre 265)
265 (WorkCentre 265)
265 (WorkCentre Pro-265)
275 (CopyCentre 275)
275 (WorkCentre 275)
275 (WorkCentre Pro-275)
288 (Nuvera 288)
312 (WorkCentre 312)
315 (WorkCentre Pro-315)
332 (DocumentCentre 332)
340 (DocumentCentre 340)
351 (XC351)
355 (XC355)
356 (XC356)
385 (WorkCentre 385)
395 (WorkCentre 395)
412 (WorkCentre Pro412)
415 (WorkCentre Pro415)
416 (WorkCentre Pro416)
420 (DocumentCentre 420)
420 (WorkCentre Pro420)
421 (WorkCentre Pro421)
423 (WorkCentre Pro423)
425 (DocumentCentre 425)
426 (DocumentCentre 426)
428 (WorkCentre Pro428)
430 (DocumentCentre 430)
432 (DocumentCentre 432)
440 (DocumentCentre 440)
460 (DocumentCentre 460)
470 (DocumentCentre 470)
480 (DocumentCentre 480)
490 (DocumentCentre 490)
510dp (Engineering Printer)
520 (XC520)
535 (DocumentCentre 535)
535 (WorkCentre Pro-535)
545 (DocumentCentre 545)
545 (WorkCentre Pro-545)
550 (Color 550)
555 (DocumentCentre 555)
560 (Color 560)
570 (Color 570)
580 (XC580)
635 (WorkCentre Pro635)
645 (WorkCentre Pro645)
657 (WorkCentre Pro657)
665 (WorkCentre Pro665)
685 (WorkCentre Pro685)
700 (Digital Color Press 700)
700i (Digital Color Press 700i)
735 (WorkCentre Pro735)
745 (WorkCentre Pro745)
765 (WorkCentre Pro765)
770 (Digital Color Press 770)
780 (Phaser 780)
785 (WorkCentre Pro785)
790 (Phaser 790)
810 (XC810)
811 (XC811)
820 (XC820)
830 (XC830)
855 (XC855)
865 (XC865)
875 (XC875)
WC-3215
WC-3225
WC-3335
WC-3345
1012 (Vintage Analog Copier)
1020 (Antique Copier)
1020 (XC1020)
1025 (Vintage Analog Copier)
1033 (XC1033)
1035 (Vintage Analog Copier)
1038 (Vintage Analog Copier)
1040 (Vintage Analog Copier)
1040 (XC1040)
1044 (XC1044)
1045 (Vintage Analog Copier)
1045 (XC1045)
1048 (Vintage Analog Copier)
1050 (Vintage Analog Copier)
1065 (Vintage Analog Copier)
1075 (Vintage Analog Copier)
1090 (Vintage Analog Copier)
1245 (XC1245)
1250 (XC1250)
1255 (XC1255)
1632 (DocuColor 1632)
1875 (XC1875)
2006 (DocuColor 2006)
2045 (DocuColor 2045)
2060 (DocuColor 2060)
2100 (Versant 2100)
2120 (XL2120)
2128 (C2128)
2130 (XL2130)
2130 (XL2130f)
2140 (XL2140)
2140 (XL2140df)
2218 (FaxCentre 2218)
2240 (DocuColor 2240)
2510 (Engineering Copier)
2515 (Engineering Copier)
2520 (Engineering Copier)
2600 (Antique Copier)
2636 (C2636)
2675 (XC2675)
2830 (Antique Copier)
3001 (Engineering Copier)
3030 (Engineering Copier)
3040 (Engineering Copier)
3050 (Engineering Copier)
3060 (Engineering Copier)
3100 (Antique Copier)
3100LDC
3100 (Versant 3100)
3107 (Antique Copier)
3109 (Antique Copier)
3116 (Phaser 3116)
3120 (Phaser 3120)
3121 (Phaser 3121)
3130 (Phaser 3130)
3150 (Phaser 3150)
3200 (Phaser 3200MFP)
3210 (WorkCentre 3210)
3215 (WorkCentre 3215)
3220 (WorkCentre 3220)
3225 (DocuPrint N3225)
3225(WorkCentre 3225)
3250 (Phaser 3250)
3300 (Phaser 3300MFP)
3315 (WorkCentre 3315)
3320 (Phaser 3320)
3325 (WorkCentre 3325)
3335(WorkCentre 3335)
3345(WorkCentre 3345)
3400 (Antique Copier)
3450 (Antique Copier)
3450 (Phaser 3450)
3500 (Phaser 3500)
3535 (DocuColor 3535)
3545 (C3545)
3550 (WorkCentre 3550)
3600 (Phaser 3600)
3610 (Phaser 3610)
3615 (WorkCentre 3615)
3635 (Phaser 3635MFP)
3655 (WorkCentre 3655)
4010 (Vintage Analog Copier)
4011 (Vintage Analog Copier)
4025 (DocuPrint N4025)
4110 (WorkCentre 4110)
4112 (WorkCentre 4112)
4118 (WorkCentre 4118)
4127 (WorkCentre 4127)
4150 (WorkCentre 4150)
4250 (WorkCentre 4250)
4260 (WorkCentre 4260)
4265 (WorkCentre 4265)
4400 (Phaser 4400)
4500 (Phaser 4500)
4510 (Phaser 4510)
4525 (DocuPrint N4525)
4590 (WorkCentre 4590)
4595 (WorkCentre 4590)
4600 (Phaser 4600)
4620 (Phaser 4620)
5000 (DocuColor 5000)
5008 (Vintage Analog Copier)
5008RE (Vintage Analog Copier)
5009 (Vintage Analog Copier)
5009RE (Vintage Analog Copier)
5011 (Vintage Analog Copier)
5012 (Vintage Analog Copier)
5014 (Vintage Analog Copier)
5016 (Vintage Analog Copier)
5016 (WorkCentre 5016)
5018 (Vintage Analog Copier)
5019 (WorkCentre 5019)
5020 (WorkCentre 5020)
5021 (Vintage Analog Copier)
5021 (WorkCentre 5021)
5022 (WorkCentre 5022)
5024 (WorkCentre 5024)
5028 (Vintage Analog Copier)
5030 (WorkCentre 5030)
5034 (Vintage Analog Copier)
5042 (Vintage Analog Copier)
5046 (Vintage Analog Copier)
5047 (Vintage Analog Copier)
5050 (Vintage Analog Copier)
5050 (WorkCentre 5050)
5051 (Vintage Analog Copier)
5052 (Vintage Analog Copier)
5053 (Vintage Analog Copier)
5065 (Vintage Analog Copier)
5100 (Vintage Analog Copier)
5113 (Vintage Analog Copier)
5114 (Vintage Analog Copier)
5126 (Vintage Analog Copier)
5135 (WorkCentre 5135)
5150 (WorkCentre 5150)
5201 (Vintage Compact Copier)
5203 (Vintage Compact Copier)
5205 (Vintage Compact Copier)
5208 (Vintage Analog Copier)
5210 (Vintage Compact Copier)
5220 (Vintage Compact Copier)
5222 (Vintage Compact Copier)
5222 (WorkCentre 5222)
5225 (WorkCentre 5225)
5230 (WorkCentre 5230)
5240 (Vintage Analog Copier)
5252 (DocuColor 5252)
5260 (Vintage Analog Copier)
5280 (Vintage Analog Copier)
5305 (Vintage Compact Copier)
5306 (Vintage Compact Copier)
5307 (Vintage Analog Copier)
5308 (Vintage Analog Copier)
5309 (Vintage Analog Copier)
5310 (Vintage Analog Copier)
5312 (Vintage Analog Copier)
5313 (Vintage Analog Copier)
5314 (Vintage Analog Copier)
5318 (Vintage Analog Copier)
5320 (Vintage Analog Copier)
5321 (Vintage Analog Copier)
5322 (Vintage Analog Copier)
5325 (WorkCentre 5325)
5328 (Vintage Analog Copier)
5330 (WorkCentre 5330)
5334 (Vintage Analog Copier)
5335 (Vintage Analog Copier)
5335 (Phaser 5335)
5335 (WorkCentre 5335)
5337 (Vintage Analog Copier)
5340 (Vintage Analog Copier)
5343 (Vintage Analog Copier)
5343c (Vintage Analog Copier)
5345 (Vintage Analog Copier)
5350 (Vintage Analog Copier)
5352 (Vintage Analog Copier)
5352c (Vintage Analog Copier)
5355 (Vintage Analog Copier)
5365 (Vintage Analog Copier)
5388 (Vintage Analog Copier)
5437 (Vintage Analog Copier)
5441 (Vintage Analog Copier)
5451 (Vintage Analog Copier)
5500 (Phaser 5500)
5550 (Phaser 5550)
5614 (Vintage Analog Copier)
5622 (Vintage Analog Copier)
5624 (Vintage Analog Copier)
5626 (Vintage Analog Copier)
5632 (WorkCentre 5632)
5638 (WorkCentre 5638)
5645 (WorkCentre 5645)
5655 (WorkCentre 5655)
5665 (Vintage Analog Copier)
5665 (WorkCentre 5655)
5675 (WorkCentre 5675)
5680 (Vintage Analog Copier)
5687 (WorkCentre 5687)
5735 (WorkCentre 5735)
5740 (WorkCentre 5740)
5745 (WorkCentre 5745)
5755 (WorkCentre 5755)
5760 (MajestiK - Vintage)
5765 (MajestiK - Vintage)
5765 (WorkCentre 5765)
5775 (WorkCentre 5775)
5790 (Regal - Vintage)
5790 (WorkCentre 5790)
5800 (Vintage Analog Copier)
5818 (Vintage Analog Copier)
5820 (Vintage Analog Copier)
5824 (Vintage Analog Copier)
5826 (Vintage Analog Copier)
5828 (Vintage Analog Copier)
5830 (Vintage Analog Copier)
5837 (Vintage Analog Copier)
5845 (Vintage Analog Copier)
5845 (WorkCentre 5845)
5855 (Vintage Analog Copier)
5855 (WorkCentre 5855)
5865 (WorkCentre 5865)
5875 (WorkCentre 5875)
5890 (Vintage Analog Copier)
5890 (WorkCentre 5890)
5892 (Vintage Copier)
5945 (WorkCentre 5945)
5955 (WorkCentre 5955)
6050 (Engineering)
6060 (DocuColor 6060)
6110 (Phaser 6110)
6110MFP (Phaser 6110MFP)
6115 (DocuTech 6115)
6120 (Phaser 6120)
6125 (Phaser 6125)
6130 (Phaser 6130)
6135 (DocuTech 6135)
6140 (Phaser 6140)
6155 (DocuTech 6155)
6180 (DocuTech 6180)
6180 (Phaser 6180)
6204 (Engineering Machine)
6250 (Phaser 6250)
6279 (Engineering Machine)
6280 (Phaser 6280)
6300 (Phaser 6300)
6350 (Phaser 6350)
6360 (Phaser 6360)
6400 (WorkCentre 6400)
6500 (Phaser 6500)
6505 (WorkCentre 6505)
6510 (Phaser 6510)
6515 (WorkCentre 6515)
6600 (Phaser 6600)
6605 (WorkCentre 6605)
6655 (WorkCentre 6655)
6700 (Phaser 6700)
7000 (DocuColor 7000)
7020 (VersaLink C7020)
7025 (VersaLink B7025)
7030 (B7030)
7030 (C7030)
7035 (B7035)
7041 (Vintage Fax Machine)
7042 (Vintage Fax Machine)
7120 (WorkCentre 7120)
7120 (VersaLink C7120)
7125 (WorkCentre 7125)
7125 (VersaLink B7125)
7125 (VersaLink C7125)
7130 (VersaLink B8130)
7130 (VersaLink C7130)
7132 (WorkCentre 7132)
7135 (VersaLink B7135)
7220 (WorkCentre 7220)
7225 (WorkCentre 7225)
7228 (WorkCentre 7228)
7232 (WorkCentre 7232)
7235 (WorkCentre 7235)
7242 (WorkCentre 7242)
7245 (WorkCentre 7245)
7328 (WorkCentre 7328)
7335 (WorkCentre 7335)
7345 (WorkCentre 7345)
7346 (WorkCentre 7346)
7400 (Phaser 7400)
7425 (WorkCentre 7425)
7428 (WorkCentre 7428)
7435 (WorkCentre 7435)
7500 (Phaser 7500)
7525 (WorkCentre 7525)
7530 (WorkCentre 7530)
7535 (WorkCentre 7535)
7545 (WorkCentre 7545)
7556 (WorkCentre 7556)
7655 (WorkCentre 7655)
7665 (WorkCentre 7665)
7675 (WorkCentre 7675)
7700 (Phaser 7700)
7750 (Phaser 7750)
7755 (WorkCentre 7755)
7760 (Phaser 7760)
7765 (WorkCentre 7765)
7775 (WorkCentre 7775)
7800 (Phaser 7800)
7830 (WorkCentre 7830)
7835 (WorkCentre 7835)
7845 (WorkCentre 7845)
7855 (WorkCentre 7855)
7970 (WorkCentre 7970)
8000 (DocuColor 8000)
8030 (C8030)
8035 (C8035)
8045 (C8045)
8045
8055 (C8055)
8055
8065
8070 (C8070)
8075
8090
8090
8265 (Vintage Copier)
8290 (Vintage Copier)
8825 (Engineering Printer)
8830 (Engineering Printer)
8850 (Engineering Machine)
9065(C9065)YY
9070(C9070)
9100(B9100)
9110(B9110)
9125(B9125)
9136(B9136)
AltaLink B8045
AltaLink B8055
AltaLink B8065
AltaLink B8075
AltaLink B8090
AltaLink C8030
AltaLink C8035
AltaLink C8045
AltaLink C8055
AltaLink C8070
B-8045
B-8055
B-8065
B-8075
B-8090
B400 (VersaLink B400)
B405 (VersaLink B405)
B600 (VersaLink B600)
B605 (VersaLink B605)
B610 (VersaLink B610)
B615 (VersaLink B615)
B8045
B8055
B8065
B8075
B8090
Bookmark 55
Bookmark 21
Bookmark 35
Bookmark 40
C400 (VersaLink C400)
C405 (VersaLink C405)
C500 (VersaLink C500)
C-500 (VL-C500)
C505 (VersaLink C505)
C-505 (VL-C505)
VersaLink C600
C600 (VersaLink C600)
C-600 (VL-C600)
VersaLink C605
C605 (VersaLink C605)
C-605 (VL-C605)
VersaLink C7000
C7000 (VersaLink)
C7020 (VersaLink)
C7025 (VersaLink)
C7030 (VersaLink)
C20 (CopyCentre C20)
C32
C35 (CopyCentre C35)
C40
C45 (CopyCentre C45)
C55 (CopyCentre C55)
C60 (Color C60)
C65 (CopyCentre C65)
C70 (Color C70)
C75 (Color C75 Press)
C75 (CopyCentre C75)
C118 (CopyCentre C118)
C123 (CopyCentre C123
C128 (CopyCentre C128)
C133 (CopyCentre C133)
C550 (Color 550)
C560 (Color 560)
C2128
C2636
C3545
Color 560
Color 570
Color C60
Color C70
Color C75 Press
Color J75 Press
CopyCentre 165
CopyCentre 175
CopyCentre 232
CopyCentre 238
CopyCentre 245
CopyCentre 255
CopyCentre 265
CopyCentre 275
CopyCentre C20
CopyCentre C35
CopyCentre C45
CopyCentre C55
CopyCentre C65
CopyCentre C75
CopyCentre C90
CopyCentre C90
CopyCentre C118
CopyCentre C123
CopyCentre C133
CopyCentre C2128
D95 (D95A)
D110
D125
D136
DC-4 (DocuColor 4)
DC12 (DocuColor 12)
DC212 (DocumentCentre 212)
DC214 (DocumentCentre 214)
DC220 (DocumentCentre 220)
DC230 (DocumentCentre 230)
DC-240 (DocuColor 240)
DC-240 (DocumentCentre 240)
DC-242 (DocuColor 242)
DC-250 (DocuColor 250)
DC-252 (DocuColor 252)
DC-255 (DocumentCentre 255)
DC-260 (DocuColor 260)
DC-265 (DocumentCentre 265)
DC-332 (DocumentCentre 332)
DC-340 (DocumentCentre 340)
DC-420 (DocumentCentre 420)
DC-425 (DocumentCentre 425)
DC-426 (DocumentCentre 426)
DC-430 (DocumentCentre 430)
DC-432 (DocumentCentre 432)
DC-440 (DocumentCentre 440)
DC-460 (DocumentCentre 460)
DC-470 (DocumentCentre 470)
DC-480 (DocumentCentre 480)
DC-490 (DocumentCentre 490)
DC-535 (DocumentCentre 535)
DC-545 (DocumentCentre 545)
DC-555 (DocumentCentre 555)
DC1632 (DocuColor 1632)
DC2006 (DocuColor 2006)
DC2045 (DocuColor 2045)
DC2060 (DocuColor 2060)
DC2240 (DocuColor 2240)
DC-3535 (DocuColor 3535)
DC-5000 (DocuColor 5000)
DC-5252 (DocuColor 5252)
DC-6060 (DocuColor 6060)
DC-7000 (DocuColor 7000)
DC-8000 (DocuColor 8000)
DCCS-50
DCP-700i (Digital Color Press 700i)
DCP-770 (Digital Color Press 770)
DCP-700 (Digital Color Press 700)
DocuPrint 65
DocuPrint 75
DocuPrint 90
DocuPrint N24
DocuPrint N32
DocuPrint N40
DocuPrint N3225
DocuPrint N4025
DocuPrint N4525
DocuPrint P8
DocuTech 65
DocuTech 75
DocuTech 90
DocuTech 128
DocuTech 135
DocuTech 155
DocuTech 180
DocuTech 6115
DocuTech 6135
DocuTech 6155
DocuTech 6180
DT-100 (DocuTech 100)
DT-120 (DocuTech 120)
EPS-4110
EPS-4112
EPS-4127
EPS-4590
EPS-4595
FaxCentre 2218
FaxCentre F12
J75 Press
M15 (WorkCentre M15)
M-15 (WorkCentre M15)
M-15i (WorkCentre M15i)
M15i (WorkCentre M15i)
M20 (WorkCentre M20)
M-20 (WorkCentre M20)
M-20i (WorkCentre M20i)
M20i (WorkCentre M20i)
M24 (WorkCentre M24)
M-24 (WorkCentre M24)
M-35 (WorkCentre M35)
M35 (WorkCentre M35)
M45 (WorkCentre M45)
M-45 (WorkCentre M45)
M-55 (WorkCentre M55)
M55 (WorkCentre M55)
M118 (WorkCentre M118)
M-118 (WorkCentre M118)
M-118i (WorkCentre M118i)
M118i (WorkCentre M118i)
M123 (WorkCentre M123)
M-123 (WorkCentre M123)
M-128 (WorkCentre M128)
M128 (WorkCentre M128)
M133 (WorkCentre M133)
M-133 (WorkCentre M133)
M-165 (WorkCentre M165)
M165 (WorkCentre M165)
M175 (WorkCentre M175)
M-175 (WorkCentre M175)
N-24 (DocuPrint N24)
N24 (DocuPrint N24)
N32 (DocuPrint N32)
N-32 (DocuPrint N32)
N-40 (DocuPrint N40)
N40 (DocuPrint N40)
N-4025 (DocuPrint N4025)
N4025 (DocuPrint N4025)
N4525 (DocuPrint N4525)
N-4525 (DocuPrint N4525)
Nuvera 100
Nuvera 120
Nuvera 144
Nuvera 200
Nuvera 288
P8 (DocuPrint P8)
P-8 (DocuPrint P8)
PE-16 (WorkCentre PE16)
PE16 (WorkCentre PE16)
PE16i (WorkCentre PE16i)
PE-16i (WorkCentre PE16i)
PE-120 (WorkCentre PE120)
PE120 (WorkCentre PE120)
PE120i (WorkCentre PE120i)
PE-120i (WorkCentre PE120i)
Phaser 780
Phaser 790
Phaser 3116
Phaser 3120
Phaser 3121
Phaser 3130
Phaser 3150
Phaser 3200MFP
Phaser 3250
Phaser 3300MFP
Phaser 3320
Phaser 3450
Phaser 3500
Phaser 3600
Phaser 3610
Phaser 3635MFP
Phaser 4400
Phaser 4500
Phaser 4510
Phaser 4600
Phaser 4620
Phaser 5335
Phaser 5500
Phaser 5550
Phaser 6110
Phaser 6110MFP
Phaser 6120
Phaser 6125
Phaser 6130
Phaser 6140
Phaser 6180
Phaser 6250
Phaser 6280
Phaser 6300
Phaser 6350
Phaser 6360
Phaser 6500
Phaser 6600
Phaser 6700
Phaser 7400
Phaser 7500
Phaser 7700
Phaser 7750
Phaser 7760
Phaser 7800
Phaser 8500
Phaser 8550
Phaser 8560
Phaser 8860MFP
PrimeLinkC9065
PrimeLinkC9070
PrimeLinkB9100
PrimeLinkB9110
PrimeLinkB9125
PrimeLinkB9136
Pro-16 (WorkCentre Pro-16)
Pro-16fx (WorkCentre Pro-16fx)
Pro-16p (WorkCentre Pro-26p)
Pro-32 (WorkCentre Pro-32)
Pro-35 (WorkCentre Pro-35)
Pro-40 (WorkCentre Pro-40)
Pro-45 (WorkCentre Pro-45)
Pro-55 (WorkCentre Pro-55)
Pro-65 (WorkCentre Pro-65)
Pro-75 (WorkCentre Pro-75)
Pro-90 (WorkCentre Pro-90)
Pro-123 (WorkCentre Pro-123)
Pro-128 (WorkCentre Pro 128)
Pro-133 (WorkCentre Pro 133)
Pro-165 (WorkCentre Pro-165)
Pro-175 (WorkCentre Pro-175)
Pro-215 (DocumentCentre)
Pro-275 (WorkCentre Pro-275)
Pro-315 (WorkCentre Pro-315)
Pro-412 (WorkCentre Pro-412)
Pro-415 (WorkCentre Pro-415)
Pro-416 (WorkCentre Pro-416)
Pro-420 (WorkCentre Pro-420)
Pro-421 (WorkCentre Pro-421)
Pro-423 (WorkCentre Pro-423)
Pro-428 (WorkCentre Pro-428)
Pro-535 (Vintage Fax Machine)
Pro-545 (Vintage Fax Machine)
Pro-635 (WorkCentre Pro-635)
Pro-645 (WorkCentre Pro-645)
Pro-657 (WorkCentre Pro-657)
Pro-665 (WorkCentre Pro-665)
Pro-685 (WorkCentre Pro-685)
Pro-735 (WorkCentre Pro-735)
Pro-745 (WorkCentre Pro-745)
Pro-765 (WorkCentre Pro-765)
Pro-785 (WorkCentre Pro-785)
Pro-C2128
Pro-C2636
Pro-C3545
V-80 (V80)
V-180 (V180)
V-2100 (V2100)
V-3100 (V3100)
VersaLink C7020
VersaLink B7025
VersaLink C7025
VersaLink C7030
VersaLink B7030
VersaLink B7035
VersaLink C7120
VersaLink C7120
VersaLink B7125
VersaLink C7125
VersaLink B7130
VersaLink C7130
VersaLink B7135
VersaLink B400
VersaLink B405
VersaLink B600
VersaLink B605
VersaLink B610
VersaLink B615
VersaLink C400
VersaLink C405
VersaLink C500
VersaLink C505
VersaLink C7020
VersaLink C7025
VersaLink C7025
VersaLink C7025
Versant 2100
WC-165
WC-175
WC-232
WC-238
WC-245
WC-255
WC-265
WC-275
WC-312
WC-385
WC-395
WC-3210
WC-3220
WC-3315
WC-3325
WC-3550
WC-3615
WC-3655
WC-4110
WC-4112
WC-4118
WC-4127
WC-4150
WC-4250
WC-4260
WC-4265
WC-4590
WC-4595
WC-5016
WC-5019
WC-5020
WC-5021
WC-5022
WC-5024
WC-5030
WC-5050
WC-5135
WC-5150
WC-5222
WC-5225
WC-5230
WC-5325
WC-5330
WC-5335
WC-5632
WC-5638
WC-5645
WC-5655
WC-5665
WC-5675
WC-5687
WC-5735
WC-5740
WC-5745
WC-5755
WC-5765
WC-5775
WC-5790
WC-5840
WC-5845
WC-5855
WC-5865
WC-5875
WC-5890
WC-5945
WC-5955
WC-6400
WC-6505
WC-6605
WC-6655
WC-7120
WC-7125
WC-7132
WC-7220
WC-7225
WC-7228
WC-7232
WC-7235
WC-7242
WC-7245
WC-7328
WC-7335
WC-7345
WC-7346
WC-7425
WC-7428
WC-7435
WC-7525
WC-7530
WC-7535
WC-7545
WC-7556
WC-7655
WC-7665
WC-7675
WC-7755
WC-7765
WC-7775
WC-7830
WC-7835
WC-7845
WC-7855
WC-7970
WC-Bookmark 40
WC-Bookmark 40
WC-Bookmark 55
WC-C2128
WC-M15
WC-M15i
WC-M20
WC-M20i
WC-M24
WC-M35
WC-M45
WC-M55
WC-M118
WC-M123
WC-M128
WC-M133
WC-M165
WC-M175
WC-PE16
WC-PE16i
WC-PE120
WC-PE120i
WC-Pro16
WC-Pro16fx
WC-Pro16p
WC-Pro35
WC-Pro45
WC-Pro55
WC-Pro65
WC-Pro75
WC-Pro90
WC-Pro123
WC-Pro128
WC-Pro133
WC-Pro165
WC-Pro175
WC-Pro215
WC-Pro275
WC-Pro315
WC-Pro412
WC-Pro415
WC-Pro416
WC-Pro420
WC-Pro421
WC-Pro423
WC-Pro428
WC-Pro535
WC-Pro545
WC-Pro635
WC-Pro645
WC-Pro657
WC-Pro665
WC-Pro685
WC-Pro735
WC-Pro745
WC-Pro765
WC-Pro785
WC-Pro-C2128
WC-Pro-C2636
WC-Pro-C3545
WC-XD102
WC-XD103
WC-XD103f
WC-XD104
WC-XD105
WC-XD105f
WC-XD120
WC-XD120f
WC-XD125
WC-XD125f
WC-XD130
WC-XD130df
WC-XD155
WC-XD155df
WC-XD100
WC-XE62
WC-XE64
WC-XE80
WC-XE82
WC-XE84
WC-XE88
WC-XE90
WC-XE90fx
WC-XE60
WC-XL2120
WC-XL2130
WC-XL2130f
WC-XL2140
WC-XL2140df
WC-6515
WorkCentre 165
WorkCentre 175
WorkCentre 232
WorkCentre 238
WorkCentre 245
WorkCentre 255
WorkCentre 265
WorkCentre 275
WorkCentre 312
WorkCentre 385
WorkCentre 395
WorkCentre 3210
WorkCentre 3220
WorkCentre 3315
WorkCentre 3325
WorkCentre 3550
WorkCentre 3615
WorkCentre 3655
WorkCentre 4110
WorkCentre 4112
WorkCentre 4118
WorkCentre 4127
WorkCentre 4150
WorkCentre 4250
WorkCentre 4260
WorkCentre 4265
WorkCentre 4590
WorkCentre 4595
WorkCentre 5016
WorkCentre 5019
WorkCentre 5020
WorkCentre 5021
WorkCentre 5022
WorkCentre 5024
WorkCentre 5030
WorkCentre 5050
WorkCentre 5135
WorkCentre 5150
WorkCentre 5222
WorkCentre 5225
WorkCentre 5230
WorkCentre 5325
WorkCentre 5330
WorkCentre 5335
WorkCentre 5632
WorkCentre 5638
WorkCentre 5645
WorkCentre 5655
WorkCentre 5665
WorkCentre 5675
WorkCentre 5687
WorkCentre 5735
WorkCentre 5740
WorkCentre 5745
WorkCentre 5755
WorkCentre 5765
WorkCentre 5775
WorkCentre 5790
WorkCentre 5840
WorkCentre 5845
WorkCentre 5855
WorkCentre 5865
WorkCentre 5875
WorkCentre 5890
WorkCentre 5945
WorkCentre 5955
WorkCentre 6400
WorkCentre 6505
WorkCentre 6605
WorkCentre 6655
WorkCentre 7120
WorkCentre 7125
WorkCentre 7132
WorkCentre 7220
WorkCentre 7225
WorkCentre 7228
WorkCentre 7232
WorkCentre 7235
WorkCentre 7242
WorkCentre 7245
WorkCentre 7328
WorkCentre 7335
WorkCentre 7345
WorkCentre 7346
WorkCentre 7425
WorkCentre 7428
WorkCentre 7435
WorkCentre 7525
WorkCentre 7530
WorkCentre 7535
WorkCentre 7545
WorkCentre 7556
WorkCentre 7655
WorkCentre 7665
WorkCentre 7675
WorkCentre 7755
WorkCentre 7765
WorkCentre 7775
WorkCentre 7830
WorkCentre 7835
WorkCentre 7845
WorkCentre 7855
WorkCentre 7970
WorkCentre Bookmark 40
WorkCentre Bookmark 40
WorkCentre Bookmark 55
WorkCentre C2128
WorkCentre M15
WorkCentre M15i
WorkCentre M20
WorkCentre M20i
WorkCentre M24
WorkCentre M35
WorkCentre M45
WorkCentre M55
WorkCentre M118
WorkCentre M123
WorkCentre M128
WorkCentre M133
WorkCentre M165
WorkCentre M175
WorkCentre PE16
WorkCentre PE16i
WorkCentre PE120
WorkCentre PE120i
WorkCentre Pro16
WorkCentre Pro16fx
WorkCentre Pro16p
WorkCentre Pro35
WorkCentre Pro45
WorkCentre Pro55
WorkCentre Pro65
WorkCentre Pro75
WorkCentre Pro90
WorkCentre Pro123
WorkCentre Pro128
WorkCentre Pro133
WorkCentre Pro165
WorkCentre Pro175
WorkCentre Pro215
WorkCentre Pro275
WorkCentre Pro315
WorkCentre Pro412
WorkCentre Pro415
WorkCentre Pro416
WorkCentre Pro420
WorkCentre Pro421
WorkCentre Pro423
WorkCentre Pro428
WorkCentre Pro535
WorkCentre Pro545
WorkCentre Pro635
WorkCentre Pro645
WorkCentre Pro657
WorkCentre Pro665
WorkCentre Pro685
WorkCentre Pro735
WorkCentre Pro745
WorkCentre Pro765
WorkCentre Pro785
WorkCentre Pro-C2128
WorkCentre Pro-C2636
WorkCentre Pro-C3545
WorkCentre XD102
WorkCentre XD103
WorkCentre XD103f
WorkCentre XD104
WorkCentre XD105
WorkCentre XD105f
WorkCentre XD120
WorkCentre XD120f
WorkCentre XD125
WorkCentre XD125f
WorkCentre XD130
WorkCentre XD130df
WorkCentre XD155
WorkCentre XD155df
WorkCentre XE60
WorkCentre XE62
WorkCentre XE64
WorkCentre XE80
WorkCentre XE82
WorkCentre XE84
WorkCentre XE88
WorkCentre XE90
WorkCentre XE90fx
WorkCentre XL2120
WorkCentre XL2130
WorkCentre XL2130f
WorkCentre XL2140
WorkCentre XL2140df
XC23
XC33
XC33D
XC351
XC355
XC356
XC520
XC-550 (Color 550)
XC-560 (Color 560)
XC-570 (Color 570)
XC580 (Vintage Compact Copier)
XC810
XC811
XC820
XC830
XC855
XC865
XC875
XC1020
XC1033
XC1040
XC1044
XC1045
XC1245
XC1250
XC1255
XC1875
XC2675
XC-C60 (Color C60)
XC-C70 (Color C70)
XC560 (Vintage Compact Copier)
XD100 (WorkCentre XD100)
XD102
XD103
XD103f
XD104
XD105
XD105f
XD120
XD120f
XD125
XD125f
XD130
XD130df
XD155
XD155df
XDL23
XDL33
XDL33D
XL2120
XL2130
XL2130f
XL2140
XL2140df