Important: The information presented here is for the use of a qualified, experienced technician. Without the background knowledge which comes with training, you risk doing more damage then good to the copier & also risk your own safety. If you are not willing to take 100% responsibility for your actions, do not use the information posted here. Thank you. Read our conditions of Use for more information.
4110 style - Web Cartridge Rebuild Instructions - for 008R13085
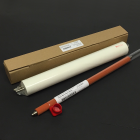
Rebuilt 4110 / 4112 / D95 Web Cartridges
| Technical Specifications |
|---|
For WorkCentre® 4110, 4112, 4127, 4590, 4595, D95, D110, D125, & D136
Replacing the webs in the Fuser Cleaning Web Cartridges is one way to reduce your supplies costs when running these marvelous 4110 style copiers. It’s a fairly simple repair really. This article will illustrate exactly how these go back together, to shorten the learning curve a bit. First we’ll talk a bit about the part numbers for the web cartridges, and the parts you will need to recondition the unit. Also we’ll see how the machine knows when the web is physically done. Next we’ll take one of these babies apart in our rebuild procedure. Then we’ll go over the web count reset procedure.
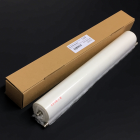
Over the years there have been several changes to the part numbers and the web length. The newest part number changed things up and added length to the web and therefore it made for a better yield. Copiers from any of the three families: 4110 family (4110 / 4590 / 4595), 4112 family (4112 / 4127), & D125 family (D95 / D110 / D125 / D136) can use any of the following web cartridges: 008R13042, 008R13085, 008R13000, or 108R00976. However the 008R13085 is the long life kind. When these new longer life cartridges were introduced, the machine's NVM settings were changed in the field as well. This means that if you use the shorter web ctg on a machine which is set for the longer life kind, it will not warn you that a new web ctg will be needed soon... it will simply run of web material abruptly and then the machine will only run again when you replace the web cartridge. The nice thing is that the webs themselves (4110FW) and the Web Pinch Rollers (4110FWPR) are interchangeable regardless of which part number you have in front of you. Usually the pinch roll is ok for a 2nd cycle, if it does not develop flat spots, but the web itself should always be replaced rather than trying to rewind it.
The machine does have a “web count” which allows it to warn the operator when it thinks it’s running low on web material, but the system isn’t perfect. If the customer running the machine runs all long pages (11x17 for example), it can run to the end of the web physically before the count is up. In those cases there may not be any warning that the web cartridge will need to be replaced “soon”. When it comes to the end of the web, the OEM web pulls clean off the end of the metal supply shaft. There are a pair of spring-metal contact arms riding on the supply end of the web roll, and once the web is gone, both of these make contact with the metal supply shaft. This completes a circuit designed to warn the machine that the web is completely out, triggering a hard-stop to help protect the heat roll and also the web pinch roll. Our replacement webs also pull all the way off the metal shaft. This is a great improvement over the earlier products which were out there. Earlier generic webs were made with the web material glued to the metal supply shaft. On those, the web material would tear off, rather than coming off the shaft. The machine would not know the web was out, so the web pinch roll would get ruined, making it necessary to replace both the web and the pinch roll in the next rebuild cycle.
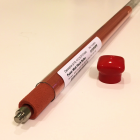
PARTS YOU'LL NEED: - 4110FWPR - Fuser Web Pinch Roll (foam roller) 1. Remove the Rear Gear Plate (2 screws: 5.5mm nut driver or #2 Philips head). Watch out! The gears can fall off easily once the plate is off. (See photo #1 to see how the gears are arranged)
WEB RESET PROCEDURE: |
| Information Reference |
Author: Britt Horvat, with special thanks to Kurt for his expertise and thanks also for support from whole Partsdrop gang. Originally published as an Article in the marvelous ENX Magazine - www.enxmag.com :) All rights reserved... you can distribute copies as long as you include a link to the source website: www.partsdrop.com |


Related Products