Important: The information presented here is for the use of a qualified, experienced technician. Without the background knowledge which comes with training, you risk doing more damage then good to the copier & also risk your own safety. If you are not willing to take 100% responsibility for your actions, do not use the information posted here. Thank you. Read our conditions of Use for more information.
7132, 7232, 7242 - Drum Cartridge Rebuild Instructions
Rebuild the Drum Cartridges for the WC-7132 / 7232 / 7242
| Technical Specifications |
|---|
For Xerox® models: (WorkCentre) 7132, 7232, 7242
The Xerox WC 7132 series are full color copiers / multifunction machines based on the frame of the black & white C123 series. Aside from the outer shape, and a few of the parts (document feeder and paper feed units for example), the similarities are few and far between. Today we’ll take apart a drum cartridge, which is proving to be one of the more profitable items to work on. While these cartridges are fairly straight-forward to disassemble, there are a few places you’ll probably appreciate a heads-up before you proceed… mostly it’s about stuff which will fall out uninvited and get lost if you’re not paying close enough attention.
These machines use a single drum cartridge sold under the part number 13R622 (or 013R00622 depending on where you’re reading). The Drum Cartridge has a stated yield of 80,000 pages. There is also an IBT Belt (accumulator belt) which the drum layers the 4 colors onto. The developer units then, are in a rotating carrousel, so that each color can be developed onto the drum one at a time. This means the drum does a fair amount of work for each copy. All the same, the initial reports from the field say that if you replace the RF (Radio Frequency) Connector CRUM Chip (Customer Replaceable Unit Monitor) to reset the drum count, and clean or replace the Charge Roll, you can expect to get a second cycle (or at least a good portion of a second cycle) out of each cartridge.
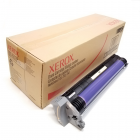
When the customer pulls the cartridge out of its carton, it is housed in an installation enclosure (see the Photo #1)
The drum count reset CRUM is already available already out there, as are the Drum Cleaning Blades and the Charge Rollers. Hopefully someone will also produce generic Drums sometime soon. Then these things will be truly re-buildable.
As you’ll see, the cartridge is easy to disassemble and nearly as easy to reassemble. The Charge Roll Assembly is the one exception… it is bit complex, so pay close attention to it when you remove it and begin disassembling it for cleaning. There are numerous parts which can fall right off once you remove something else, so you will want to secure those items as you come across them to help avoid losing them. You would not want to accidentally such anything into your vacuum cleaner. Now lets get to it:
Reconditioning Procedure:
1.) Remove the gray Front End Cover (2 screws) (see Photo #2). Watch for, and retrieve a long skinny spring (the Shutter Spring) which is tucked into a black hole. It could easily fall out and could get lost. (see photo #3)
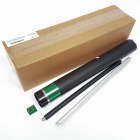
2.) Remove the Top Metal Rail (2 screws, one at each end).
3.) Next remove the Rear End Cover while holding onto the rear end of the Charge Roll Assembly (see Photo #4). This is important because the Rear End Cover has a long protruding piece which retains the Charge Roll Assembly… when the Rear End Cover is removed, the Charge Roll Assembly will fall right off. If that is ever to happen to you, you’ll want to refer to Photos 5, 6, & 7 which show the 3 pieces which form the rather complicated bearing and contact menagerie at the rear end of the Charge Roll assembly.
4.) The Charge Roll Assembly drops down at the rear to then pull out of the Front End. The unit is made up of a Charge Roll set into line bearings with a Cleaning Roll beneath it in the same line bearings. Then there is a metal clip which serves as the grounding piece for the Charge Roll Assembly. Finally there is yet another piece which serves as the Charge Roll’s actual Contact Terminal. See Photos 5, 6, & 7 to help reassemble stuff after you are done cleaning everything. The Charge Roll itself will respond well to sink washing with warm water and soap. Rinse it good and let it dry completely.
5.) Now remove the Rear Drum Bushing… it extracts straight out with little effort (see Photo # 8)
6.) Next hold onto the Drum while removing the Front Metal Plate. Take care… the plate has the front Drum Spindle built into it… Once the plate is removed, the drum will fall right off. Also now you will want to remove the auger shutter (a small plastic sliding plate which covers the auger’s hole… it can fall right off once the Front Metal Plate is removed). Refer back to Photo #3.
7.) Remove the Drum cleaning Blade (2 screws) and clean everything out nicely. Be very gentle around the Mylar Recovery Blade as it is a fragile component.
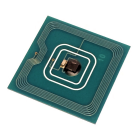
8.) Finally replace the Drum Reset Connector CRUM (chip) in the Front end Cover (see Photo #9). You will need to flex the CRUM and the cover a little bit to get the CRUM to slide out past the plastic retaining burr… then use a long narrow tool to help push the CRUM the rest of the way out (you can push through a square cut out on the plastic cover. The generic CRUMs we’ve seen so far all seem to have larger electronic components compared to their OEM counterparts… but they fit ok if you put the electronics stuff facing inward.
THAT’S IT !
Not bad at all. Hopefully all the little warnings about stuff which falls-right-off, will help steer you right on your first crack at one of these puppies.
Happy Reconditioning everyone ! |
| Information Reference |
Author: Britt Horvat, with special thanks to Kurt for his expertise and thanks also for support from whole Partsdrop gang. Originally published as an Article in the marvelous ENX Magazine - www.enxmag.com :) All rights reserved... you can distribute copies as long as you include a link to the source website: www.partsdrop.com |


Related Products